How to Create Kitchen Zones for Oak Kitchens
Many fans of our oak kitchens may be familiar with the ‘kitchen work triangle’ concept, which helps determine the most effective layouts for an efficient, well-planned kitchen. The work triangle targets the three primary areas a kitchen-user will utilise, namely the stove, sink and the refrigerator, and ensures they are sufficiently far apart to prevent crowding, but close enough to allow for easy transitioning between stages of the cooking process. This popular design concept was developed in the 1940s, and is still often referred to today. However, much has changed since the notion of the work triangle was originally conceived, and space planners now also use ‘zoning’ to configure layouts for the modern kitchen.
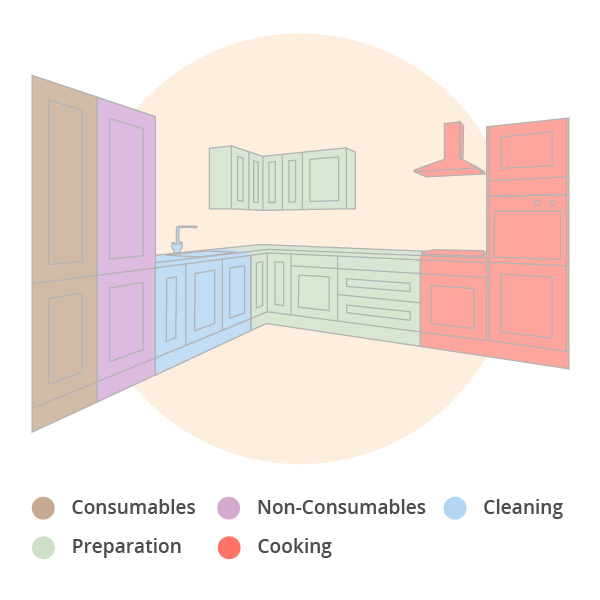
The intention of creating kitchen zones is to clearly divide up different spaces of your kitchen with the purpose for which they are intended in mind. In the 21st century, this concept is often seen as more practical, as modern day kitchens tend to exhibit a greater variety of sizes and arrangements. Furthermore, unlike the kitchen work triangle, the design concept is also relevant and useful for those with an existing kitchen who do not wish to relocate their refrigerator, sink or oven.
Kitchen zoning can be applied to any kitchen, whatever its size or shape:
-
Cooking zone – the area where your oven, range or stove is located, alongside a microwave (if you have one)
-
Food preparation zone – the area where your cut, chop and prepare fresh produce, be it a portion of worktop, a kitchen island, or a butchers block trolley.
-
Cleaning zone – the area that contains the sink and dishwasher (if you have one)
-
Consumables zone – the area where most food is stored, which may be divided between kitchen cabinets, for dry goods, and the refrigerator, for fresh food.
-
Non-consumables zone – the area used to store kitchenware such as crockery, dishes, cutlery, glasses and mugs.
Step 1: Divide your kitchen into five zones
Step 2: Store items within their relevant zones
To improve your kitchen’s functionality, items should be kept within their respective zones. This makes them easy to find, making the cooking process much more efficient.
Keep cooking tools close to the area they best relate to. For example, knives, chopping boards and utensils should be located near to the food preparation zone, where they are most likely to be needed. Similarly, baking trays and cooking utensils should be situated within reach of the cooking zone.
Step 3: Store dishes used on a daily basis in a cabinet close to the sink or dishwasher
The next step saves time and effort when stashing away items that have recently been washed up. Shortening the distance between the draining board and the cupboard designated for plates and bowls eliminates too much walking back and forth.
Step 4: Locate your food preparation zone adjacent to your cooking zone
As in step 3, this strategic placement of your kitchen zones is a logical move, and makes transferring food from chopping board to pot as easy as possible. In a perfect world, the preparation zone and your cooker should not be more than a few paces apart, saving time and reducing the risks of dropped food. It is best to keep the preparation space clear of any unnecessary countertop items that could be located elsewhere.
For those with kitchen islands, you may wish to capitalise on this space as a larger food preparation area. In this case, we advise locating these two zones directly opposite from one another, so you simply need to turn to move your freshly prepared produce from the chopping board to the stove.
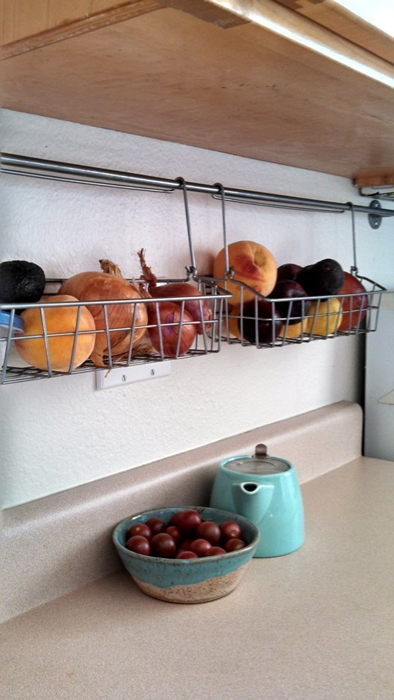
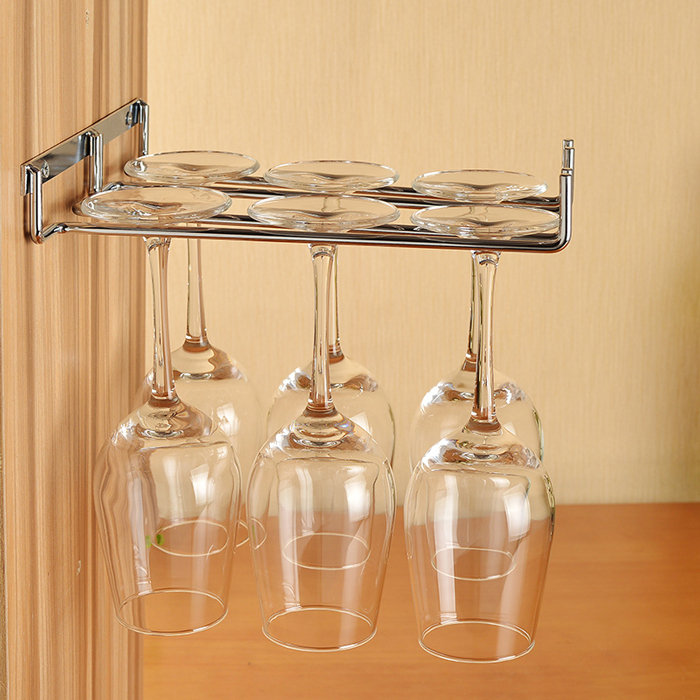
Step 5: Get creative with storage solutions
Efficient kitchen zoning can be very rewarding, and has a significant impact on many of your daily activities. If yours is a kitchen of modest proportions, you may benefit from integrating such handy storage solutions as space-saving wirework or accessible wicker baskets.
Other solutions for maximising your cabinet space include stackable shelves, hanging baskets on an under-cupboard pot rail, helping you ensure all your kitchen items remain within their designated zones.

Whether you are planning a new kitchen or simply perfecting your existing one, zoning is a practical way to ensure your culinary experience is as easy and efficient as possible. If you would like to get in touch to discuss your new oak kitchen, please don’t hesitate to contact us on 0345 22 22 990, or email .
2 Comments
Leave a comment
I consent that the information I have provided may be used by Direct Online Services LTD for continued correspondence. You may opt out at any time by contacting us, or via the 'Unsubscribe' link at the bottom of any email correspondence. Please view our privacy policy for further information.
Pingback by Combining Base, Wall and Full-Height Units in Solid Oak Kitchens - Solid Wood Kitchen Cabinets Information Guides
July 1, 2016 @ 12:55 pm
[…] out more about the ideal kitchen layout in our ‘Kitchen Work Triangle’ and ‘How to Create Zones for Oak Kitchens’ information […]
Pingback by Kitchen Cabinet Zones
October 25, 2019 @ 9:37 pm
[…] View Image More Like This […]